More

Landmarks in Huzur Gardens

1. The Monument of Huzur – The dictionary defines a monument as something built or placed to commemorate a person or event, something shown or maintained for depicting historical or aesthetic interest. When TAFE’s founder Chairman Mr. S. Anantharamakrishnan purchased the Huzur Gardens estate five decades ago, there was a monument existent inside the garden, presently at the entrance of Shardlow India Limited. As requested by the previous owner of the estate, the monument is preserved till date by the Amalgamations Limited. Though it is a small building, a beautiful garden maintained around the structure never fails to attract people passing by.

2. Founder Chairman – Mr. S Anantharamakrishnan’s Statue – Within Huzur Gardens, right at the entrance of India Pistons Limited (IPL), stands the statue of the founder chairman of TAFE, Mr. S. Anantharamakrishnan in front of the administrative building of IPL. It grabs the attention of almost every, and stands evidence to the everlasting presence of the architect of Huzur Gardens, which paved way for the formation of numerous companies of the Amalgamations Group.

3. The Big Banyan Tree – When we enter the compound through the front gate, to the left side, you can see a beautiful lawn housing a huge banyan tree at the center. The tree is quite thought provoking and propagates a distinct peace of mind. Spending some time under the tree will definitely help you rejuvenate your brain, body and senses.

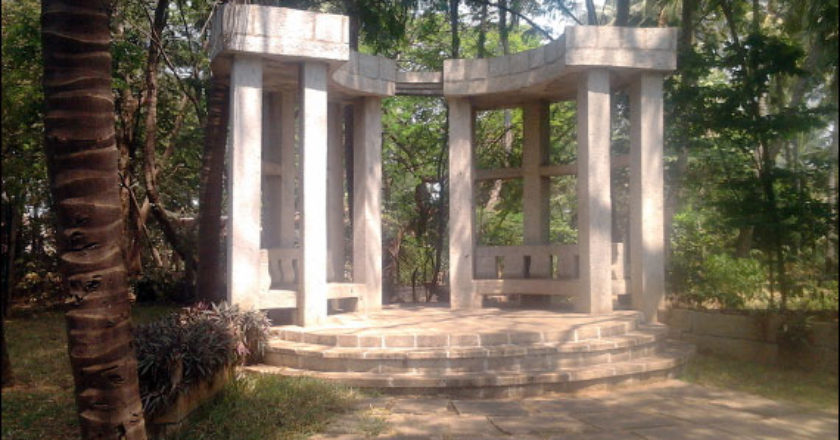
4. The Huzur Garden Stonehenge – Behind the staff canteen of TAFE is a big lotus pond. Walking down the path up till the end of the pond, you will come across a semi circular structure formed out of columns with a roof and some chairs, which are completely made up of granite stones. I have seen a similar structure in Chamundi Hills at Mysore. This structure was built by the First Chairman of TAFE, Mr. A. Sivasailam, in the memory of his sister Ms. Kalyani Sundaram who used to sit here gazing at the lotus pond.


More

Make Your Personal Waterfall

This new year – 2012, I wanted to begin it afresh. First thing I thought of was to bring in some positive energy at my home, which would instill a new sense of confidence and vitality. Thus, I thought of decorating the interior with something new and creative. Hence, was born the idea of a ‘Home Made Waterfall’, as I always wanted to be as close to nature as possible.

I am no professional to do this but the mere attempt has given me the confidence to explore the unconventional. Here’s sharing the way to make your own waterfall, at home.

Materials Used – Waterfall

Old piece of thermocol – round shaped
Stones / pebbles
Small size aquarium water pump and pipe of small length cut from the garden hose pipe
Water color, paints and brush
Adhesive, pen knife, colored beads and pins
Small idol – from an old keychain
Decorative piece for the idol’s background
A coconut shell
Wheat flour – 50 gms
A small plastic container

Procedure for making the Waterfall

First a small sketch / drawing was made for the type of water flow required (it is left to ones imagination and choice). The basic idea is simple. Water has to cascade down from the top to the bottom through a series of 2 or three steps in a zig zig manner.

Based on the above imagination, the thermocole was cut accordingly.

Since thermocole doesn’t a too natural look, I decided to cover it up with a coating of wheat flour paste (surprisingly it worked).

The set up was kept for drying for a couple of days.

The thermocole now had a more natural rocky appearance, covered with clay.

On top of this, I painted the surface with an earthy shade.

Then filled the plastic container with water and immersed the aquarium pump in it.

One end of the small pipe was attached to the pump outlet and the other end was kept open
To fit the other end of the pipe, a small opening (to make a perfect fit) was made at the bottom of the coconut shell (you must be careful while making the opening as the shell might break)

The pipe was inserted and kept on top of the thermocole set up at the center and now, the setup is ready for testing

Switch on the pump and see the water filling the coconut shell and flowing through the carved out passages we have made.

Finally the ‘Small Home Made Waterfall’ will be ready to thrill you and make you feel relaxed by listening to the sound of water trickling down.

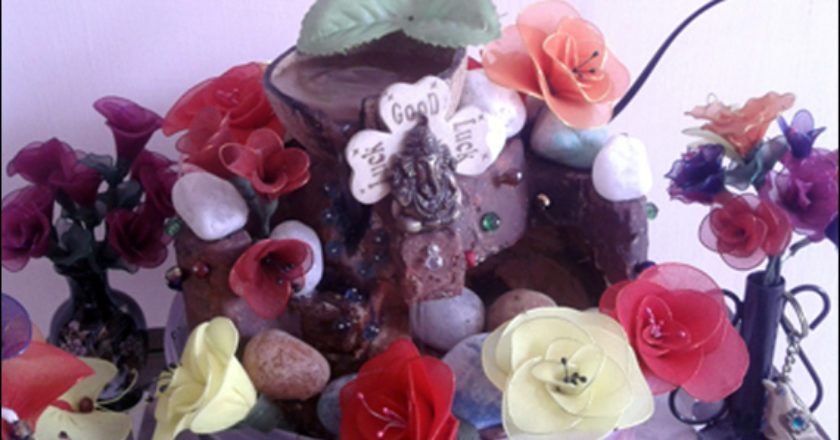
The pebbles and stones were placed on the top and side of the set up to create a natural appearance.

Small colored beads were placed at random around the waterfall for some light effects, especially in the evenings.

Handmade flowers were also used to decorate the Waterfall.